Thursday, December 23, 2010

More apples for Christmas

I blogged about a week ago about a dress I made my almost three year old for Christmas.

My little boy now has a matching shirt in the green colourway of the same fabric! It's my usual shirt pattern (sketchbook by O+S) with pearly snaps instead of buttons. I made the collar and placket cream so it's extra matchy (and naff!) on Christmas day.

When I went to cut out the shirt I found I had nowhere near as much of the green fabric as I thought. The very lovely Emma came to my rescue with some yardage from her stash - you can check out her amazing blog here. Thanks Emma!

Merry Christmas everyone, hope you all have a happy and safe holiday.


Shirt for my 15 month old. He'll wear it with some store bought shorts as I ran out of time to make some. They're beige with apple green trim.


To match this dress for my nearly three year old.

Monday, December 20, 2010

Robots for Christmas

Just finished another night's Christmas sewing. This time it's an O+S sketchbook shirt and a MIP lazy day hat for my nephew.

If you read this blog often you'll know that I've made both of these patterns before and love them both. They're simple and look great.

The fabric I used is by Kokka - I have used it before in a different colourway to make shorts for my son. I really love it. I think it might be a bit busy for this shirt, but if anyone can get away with a busy shirt it's an 18 month old.

The only thing I did differently when constructing the shirt was to cut the collar interfacing along the collar fold line (a tip I got from the Oliver + S forums). This makes the collar much easier to fold, especially as I used quite a thick fabric.

Excuse the dodgy photos, they were taken at night, using a flash, as I need to wrap and post this present first thing.


The finished shirt. Quite busy, but I like it!


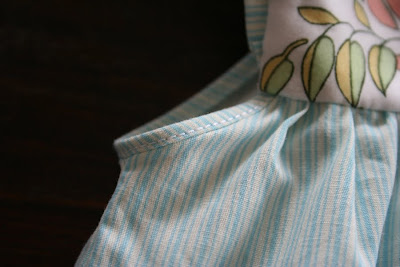
Inside. Constructing the yoke is fiddly but the results are so neat.


The hat. This pattern is really well suited to cotton canvas.


Fabric detail - because I love it!


A few of the robots got a head transplant where I attached the pocket.

Friday, December 17, 2010

Apples for Christmas

One week til Christmas eve - hurrah!!!

I wanted to make my kids something to wear on Christmas day. Using overtly Christmas prints on clothing isn't really my thing, but I still want them wearing clothes that are festive on the big day.

I have previously made view B of the jump rope dress by Oliver + S, and loved it (everytime DD wears it we get asked where we got it). View A has been on my wish list for a while, so I thought I'd make one up for Christmas.

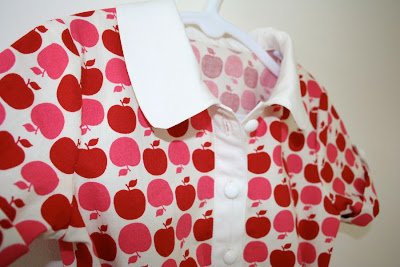
I had a couple of yards of Sandi Henderson's apple dot in red in my stash, and the colours suit my DD and Christmas, so I decided to use that. As the print is quite busy I constructed the placket and collar in a plain cream cotton to break it up and frame DD's face. If I had enough fabric I probably would have made the sash up in cream too... But I didn't, so apples it is.

The pattern was just what you'd expect from O+S - clear and easy to follow. This is quite an involved pattern though, lots of little elements that take more time than you expect (the placket, sleeve tabs, pockets etc). This dress took me three nights to make (one night cutting and another two nights sewing) so I am pleased to have it finished.

I need to make my son something for Christmas now. I am considering a sketchbook shirt in co-ordinating green apple dot fabric. What do you think - too naff? I am so tempted.


The dress! I think this fits the brief of being Christmassy without being *too* Christmassy.


Placket and collar constructed in cream. The buttons are the same white plastic button I used for the Swingset tunic.


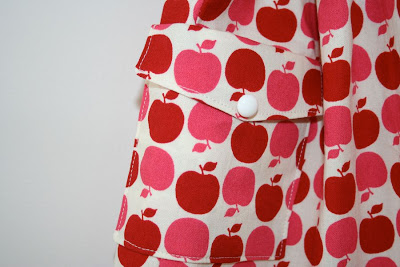
The pockets. I think I should have made the top part up in cream...


The sleeve tabs are made up in cream too, and finished with the same style of button as the placket, but smaller. I love these sleeves, so cute. They'd work well on a boys' shirt too I think.

Sunday, December 12, 2010

Little stockings for little elves

I adore Christmas. I really, really love it. I event wanted to give my daughter 'Christmas' as a middle name, but my husband vetoed it (much to the relief of pretty much everyone I know).

Growing up, Christmas was a big deal in my house and we had a heap of little family traditions. One of my favourites was digging out our Christmas stockings on Christmas eve and leaving them out for Santa.

My childhood Christmas stocking was beautiful. Mum made it by hand and it's gorgeous. I have brothers either side of me, both very close in age, and we each had our names appliqued onto our stockings and I thought it was just wonderful.

When we were a little older, my little sister was born. I always felt very sad that she didn't have a Christmas stocking made by mum (mum had enough to keep her busy with 4 kids under 6). She did get her own special stocking from I think Disneyland of all places, but I always felt a little sad for her on Christmas eve. I don't think she ever cared, especially as her stocking was bigger than ours.

When I had my first baby in 2008, I remember being very excited about being able to make her a stocking and starting our own little family tradition. Back then I had never used a machine, so decided to make her a stocking by hand. I ended up spending close to $100 at the fabric shop - I bought enough fabric to make a stocking for my little girl and 3 potential siblings!

I stayed up late each night for a month, hand embroidering the baubles and stiching silver ribbon down the stocking. I loved being able to use it for her first Christmas.

My son was born last year, in 2009, and to my disappointment I did not get the chance to make him a stocking before his first Christmas, due to him being a refluxy baby who needed to be held for every.single.sleep until he was 4 months old.

This Christmas I have a 1yo and a 2yo and they now each have their own, personalised Christmas stocking. Now that I can sew (hurrah!) I made my son's on the machine, and it's all machine embroidered. Much faster!

Hopefully, in 2011/2012 I'll have another little elf to make a stocking for. I'm already planning what it will look like (little gingerbread men, perhaps?)

Merry Christmas!


The finished stockings. The one on the left is made my hand (inc applique) and the one on the right is done by machine. Both are fully lined.


Their names are blanket-stitched using silver thread. I traced the font directly from my computer screen onto vliesofix. The font is Cooper Black.


My daughter's stocking is decorated with Christmas baubles. I used Donna Hay cookie cutters to get the shapes. The neck of each bauble is appliqued with thick silver ribbon, and each is 'hung' using narrow silver ribbon. The cutters are no longer available but you can get a similar set here.


My son's is decorated using different sized snowflakes, some stitched in silver, others in red and white. Even though they were machine appliqued it took a long time. A definite labour of love!

Wednesday, December 8, 2010

Double gauze for Summer

Yet again it's been a long time between posts. I've been busy altering and hemming bridesmaids dresses (the silk chiffon nearly drove me to drink) and have quite a few little outfits on the go, which I just need to sit down and finish (you know - hems and buttons and all the fiddly bits).

But on to my latest project.

My friend recently asked me to make a new top for her daughter. As she is very fair-skinned, she wanted something with long sleeves, but still cool enough to wear in the heat.

Oliver + S's 2+2 blouse has never been my favourite pattern, but I did purchase it recently to make a short-sleeve version for my little girl this Summer. I thought the gathers and relaxed neckline of the 2+2 would be perfect for a Summery top for my friend.

I decided to use double gauze for the main fabric. I own perhaps 10 yards of double gauze but until now have never sewn with it (oh the shame!). For this top I used the blossom print in blue from Cosmo textiles. I adore this fabric, and raced out last week to buy the same print in a different colour for my daughter.

The double gauze was extremely soft and lightweight. It was lovely to sew (although it does have a life of its own at times) and it irons beautifully. If you are using it I would recommend drying it flat. Mine stretched a little on the clothes line.

I am really happy with the finished top - in fact I love it and am now a 2+2 convert. I really enjoying constructing it, I feel like my sewing IQ is a bit higher after seeing how the neck opening was formed.

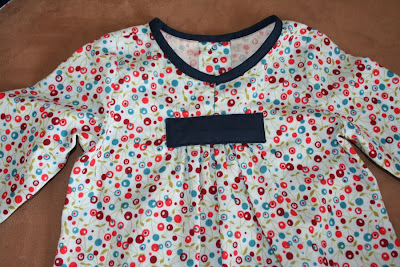
I decided to leave the ties off this version, finishing the neck binding as per the back, and keeping it unfastened so it falls open like a kaftan/tunic.

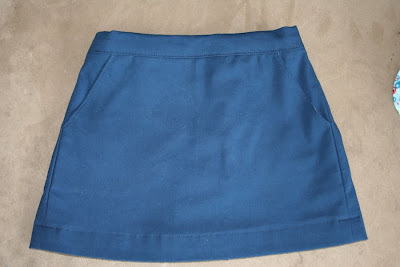
I also made a Sunday Brunch skirt (also by Oliver + S) in navy cotton to match the trim on the blouse. The pockets are lined with the double gauze. I love little hidden details :)

Finally, I made a sunhat to finish off the outfit and keep her little face protected from the sun. The pattern is the Make it Perfect Lazy Day hat, which I have made before and just adore. I was worried the gauze might be too floppy for the hat, but with a stiff-ish interfacing adhered to it it worked beautifully.


The complete outfit.


Blouse detail. I left the ties off. When worn, the neckline hangs open a little like a kaftan/tunic.


The Sunday Brunch skirt. Can't wait to make lots more of these - have some cute ideas for my daughter.


Little detail: the pockets are lined in the double gauze.


Fully reversible sunhat.

Thursday, November 18, 2010

Reusing some much loved fabric

My daughter received the most beautiful dress for her first birthday. I loved it, particularly the fabric. Unfortunately, it was way too big, and by the time the next Summer rolled around she was too tall for it.

Since then it's been sitting in her cupboard, as I loved it too much to throw out. It's been waiting for daughter #2 to show up, but there's every chance I won't have another daughter, so last weekend I decided to cut the dress up and put the fabric to good use as a new top for my little girl.

I've wanted to make Oliver + S's Swingset tunic for a while. I love the structured look of the bodice compared to the floaty main panel. I used the recycled fabric for the main panel. It's printed floral voile and so sweet. I used a plain white quilter's cotton for the bodice.

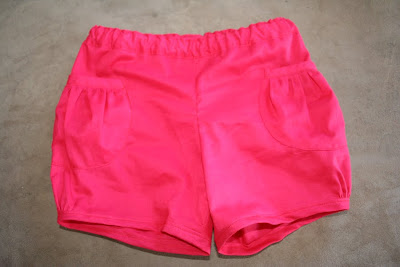
I also *finally* got around to making some puppet show shorts too. I have long admired these and am really pleased with how they look and how easy they were to sew. I wanted them to match the Swingset tunic, so used the same deep raspberry colour that's in the top, to make the shorts.

The shorts are made of voile, which is super sheer. I ended up using a double layer of the voile for the main part of the shorts (so no-one has to be subjected to my little one's Dora knickers!) with a single layer for the pockets, waist and binding.

I really, really recommend these shorts. They look so cute on and are quick to make.


The original dress


A few hours of unpicking and sewing later, turned into this. Hurrah!


I love the structured yoke with the floaty gathers. Liesl from O+S is a genius :)


The back is buttoned with three white, glossy plastic buttons.


The finished shorts. The colour is washed out here, it's a deep, almost red, raspberry colour.


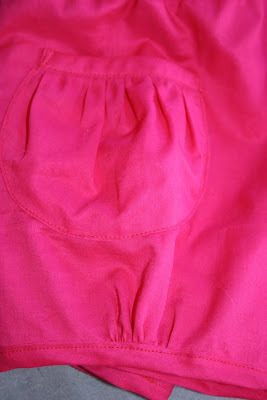
The shorts have a cute gathered pocket, and gathers at the cuff, which make them bloomer-ish.


The finished ensemble.

Saturday, November 13, 2010

Monogramed shirt for Baby Z

A little while ago I posted about this set I made for a baby shower. Well, on Thursday morning my friend delivered a beautiful baby boy. Eeeee!!! I'm off to meet him in an hour and cannot wait.

He arrived a little early and I was completely unprepared with a present (especially as I didn't know his gender before he was born). But I knew I really wanted to bring something to the hospital, so I pulled out my well-used Sketchbook Shirt pattern from Oliver + S. I have made this four times now and it gets easier every time.

I didn't have time to go fabric shopping, so I used some blue and white seersucker from my stash. I was very tempted to use one of the many cutesy boyish prints I own, but I think the stripes work better for this shirt, especially as it is sized 12-18 months (for next Summer). In any case this little man is going to get a zillion gifts from me over the coming months so I can use some of the cuter fabric for those.

I have never sewed with a narrow stripe before and it was challenging. It shows up every little mistake. You have to be so precise with your cutting and that is hard with seersucker!

I knew I wanted to personalise the shirt, but didn't know how. I thought about an embroidered pocket like I did here but that wouldn't really work on the seersucker. I eventually decided to play around with the stripes and applique a 'Z' monogram (first letter of his name) using horizontal stripes on the vertical pocket. I'm really happy with it. It's kind of subtle, but funky. My husband thinks I should have stitched it on using navy thread... I'm undecided. It would have made it stand out more, but I kind of like it the way it is.

I used navy snaps instead of buttons - I didn't have anything appropriate in my button box.

Time to grab some lunch and then get to the hospital. Can't wait to meet you Baby Z!


Finished shirt. Size 12-18 months.


Monogramed pocket detail.


Close up. I picked a font I liked on the computer, enlarged it and flipped it. Then I traced in directly from the screen onto some vliesofix. After ironing it onto the fabric I cut around the Z.


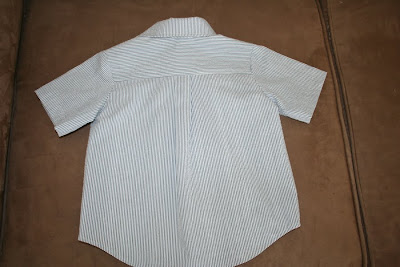
The back. The yoke is cut across the grain. I thought about chevroning it but I only had a few hours to make this shirt, so decided not to.

Sunday, October 31, 2010

J'adore!
I'm a bit of a blog and Flickr junkie - always looking for something new to inspire me. A few months back I saw the most gorgeous little top on Flickr and fell in love. After a bit of investigating I discovered a range of kids' patterns I had never seen before. Uh-oh... Dangerous. Within half an hour I had ordered one of the patterns to try it out. Nothing wrong with that, except that it cost $35 and it's French. As in all the instructions are in French.

Fast forward a few months and I finally got brave enough to give it a go. I actually studied French for a number of years as a child but typically, it didn't come it handy when it came to deciphering the instructions. However, the pattern was fairly straightforward and intuitive, and I was able to bluff my way through (using some of the techniques I have learned from Oliver + S patterns). I also relied heavily on other blogs to figure out things like whether the seam allowance is included (the jury's still out). I also learned that the sizes run small, so knew to upsize for my daughter.

Speaking of sizes, these patterns start at sz 2 and go up in 2s, so I made a sz 4 for my (very tall) 2.5 year old. It fits, and with plenty of growing room.

The pattern itself it very simple. I read somewhere that Citronille patterns are like cooking a very basic meal, but with top notch ingredients, and I have to agree. The lines of the top are lovely with everything sitting 'just so'. The pattern was interesting in that it didn't have a lot of the sewing marks I'm used to, like fold lines/grain lines.

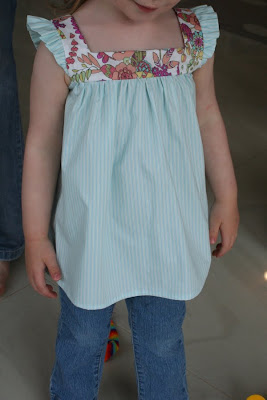
I used some of my precious Liberty stash for the yoke. My husband gave it to me for mother's day. It's a seasonal print called GiGi Garland and I adore it. I matched the pale blue stripes of the print with a blue cotton ticking. The top has a simple button down placket at the back.

The pattern is called Apolline (it can be made as a tunic or dress) and the company is Citronille. I like this company very much, quirks and all, and will buy a few more of their patterns. They also have knitting patterns, patterns for babies, women's patterns and a small range of (lush) fabric. Their website is in English (although again, the patterns are NOT!)


The finished tunic. I do own an iron, I just don't like it very much.


I matched the blue in the yoke to a blue ticking for the bodice.


Yoke detail. I adore adore adore this Liberty print.


The armholes are finished using a very narrow bias binding.


Sweetpea - she likes it!
Wednesday, October 27, 2010

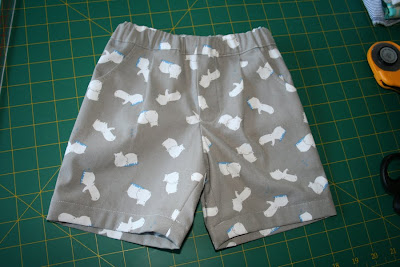
Sketchbook hippos

I have two new newborns in my life to cluck over! Babies Max and Curtis were born to two very good friends just two weeks apart in July & August.

Shamefully, I have only just finished their presents. I rather uncreatively made them the same little outfit - an Oliver + S sketchbook shirt and shorts, in size 6-12 months for this Summer.

I've made the sketchbook shirt before and really love this pattern. I've not made the shorts before as I was a little turned off by the pleat in them, but the finished garment is really lovely. I especially love the fake fly.

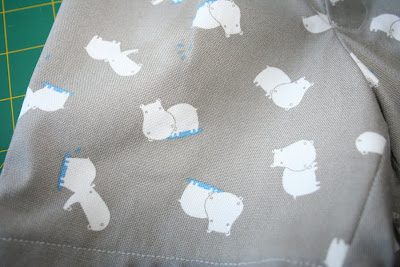
I used a print from Daiwabo's Tip Top canvas collection - hippos in grey. The shirt is a Kona solid in a coordinating blue.

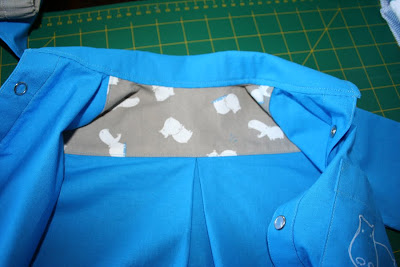
I wanted to 'tie' the two pieces together, so I made the shirt's inside yoke using the hippo fabric, and embroidered a hippo on the shirt pocket (I sketched it on then stitched it a few times using a very short stitch). I'm really happy with the way the pockets turned out.

A few things I learned during this process:
1) I get bored very quickly making the exact same outfit twice
2) My sewing has improved since July when I started these outfits. On one hand that's great, but it irks me to give a gift that I think could be 'better' than it is.
3) I really should have tried harder to match the thread to the Kona.

Some pictures:


I thought the pleat was too preppy but I am really happy with these.


Fabric close-up. I matched the blue puddles to the Kona I used for the shirt.


Full outfit (you can just see the other one peeping out in the top left corner)


I used the hippo fabric from the shorts on the inside yoke, to tie the two separates together.


Detail of the embroidered hippo - my favourite part of the whole outfit.

Sunday, October 17, 2010

New blouse for Summer

A little while back a couple of the big fabric companies put out new collections that weren't quilting cotton. Hurrah! These fabrics have the gorgeous prints that I love in quilting cottons, but a lighter weight, which is perfect for summer clothing. Lecien released a range of voiles, and Alexander Henry did a range of cotton lawn (although some sites are calling it voile - who knows?!)

I snapped up some of both ranges.

I have made Oliver +S's music class blouse before, but not for my daughter, so I decided to make her a lovely floaty blouse for Summer.

The fabric I used was Lecien's Memoire a Paris, which is a very light voile. I spent ages choosing which colourway to get (they are all fabulous) and in the end decided on black. I don't usually like to dress my little girl in black but this particular fabric is covered in little pink and purple flowers, so I made an exception. It reminds me a little of Liberty.

The blouse was lovely to sew, and the black is extremely forgiving. I was going to gather instead of making the pintucks, but decided they were such a cute detail that they were worth the time.

The buttons are a dark mother of pearl, which picks up the pink and green in the fabric.

The blouse is a size 3 and is a little roomy, and just the right length (maybe a touch short). I think this is the last year I will be able to sew for my little girl without altering the patterns. She's now nearly a metre tall and still slim, so I'm going to have to lengthen everything from now on :(

Here are some pics:

Finished blouse. This is a rubbish photo but it shows the details... kind of. Black is hard to photograph!


Detail of the top. The buttons are a bit darker than this - they were reflecting the light.


Pintucks! I used Liesl's tip and pulled the threads through to the back and knotted them. This gives clean pintucks without the need to lockstitch or backstitch.


My favourite detail: a little inverted box pleat on the sleeve cap. Bliss :)


The fit. I think this will look cute with a little demin skirt and sandals.

Saturday, October 9, 2010

More bees for a mum to be

Another day, another baby shower! This morning's shower was for a wonderful friend who is six weeks away from meeting her little baby.

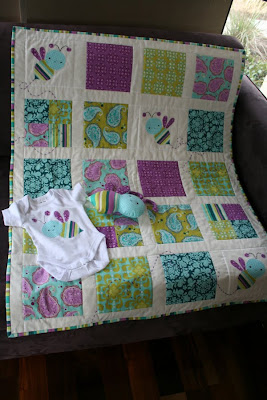
I decided a while ago to make her another bumble bub quilt using Melly & Me's pattern from their Kaleidoscope book (I have made two previously) but this time with a few changes. As her baby's sex is a surprise I used gender neutral colours - mainly green and purple. All fabrics are from Sandi Henderson's Farmers' Market range, which I just adore. I have actually seen this quilt made up in these fabrics somewhere, but now cannot find the blog anywhere - let me know if you know the one I'm talking about. I think it may be Scandinavian?

I made this version a little smaller than the pattern. It is 4x5 blocks rather than 5x6. I did this to make it easier to quilt, and it's a really good size for a baby.

The quilting is very simple, I basically quilted around the border of each block. I like it that way as it means that the quilting doesn't detract from the little bees.

I included 'flight lines' from the bees in this version and just love the result. They're stitched by hand using a running stitch and embroidery floss. I think they add to the playfulness of the quilt. The quilt was bound by hand over a couple of nights in front of the telly - bliss! The quilt batting is a 50/50 blend of cotton and bamboo, so it's soft and natural.

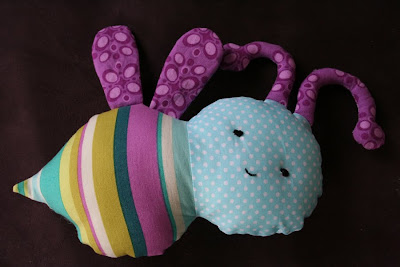
I also made a matching bumble bee softie, using the pattern from the book. The only variation I added was stitching some scrunched up cellophane into the lining of the wings to make it fun for the baby to chew and play with. Last night I also appliqued one of the little bees onto a store bought onesie, to complete the gift. I was sad to see this one go as I love it so much, but I know it's going to a wonderful home.


The finished quilt. It is bound using the stripey fabric that the bee bodies are made from, and is backed in the spotty looking lime green fabric (called 'pomegranate seeds')


One of the flight lines. This is such a cute little detail!


Bee softie. The wings are lined in cellophane to make them crackle.


Little appliqued onesie


The completed gift.